“`html
Epoxy floor moisture problems concrete slab: why it fails and how to fix it before you coat
⏱️ 7 min read · Last updated: 2026
- Acceptable concrete slab moisture emission: 3 lbs or less per 1,000 sq ft per 24 hours via calcium chloride test (ASTM F1869), or 75–80% relative humidity via in-situ probe (ASTM F2170).
- Calcium chloride test threshold for standard epoxy: 3 lbs/1,000 sq ft/24 hrs — readings above this require a moisture mitigation coating before epoxy application.
- A two-part epoxy moisture barrier primer typically adds $1.50–$3.00 per square foot to the total floor cost, depending on system and local labor (2026 estimates).
- New concrete slabs should cure for a minimum of 28 days before epoxy application; slabs in high-clay or caliche-rich soils may need 60 days or longer.
- Concrete vapor barrier (6-mil polyethylene sheeting under the slab) reduces vapor drive significantly — but slabs poured without one have no retrofit equivalent short of a topical moisture mitigation coating.
The epoxy bubbled up within six weeks. That’s the story I hear most often from homeowners who skip the moisture test — and it’s almost always the same culprit: vapor drive that nobody tested for before the crew showed up with rollers. The coating looks fine on day one. Then the Texas heat kicks in, the ground warms up, and the vapor pressure under the slab has nowhere to go except straight through the epoxy bond line.
In Amarillo specifically, this problem has a local amplifier most articles ignore: caliche soil. Caliche is a calcium carbonate–rich hardpan layer common across the Texas Panhandle. It traps moisture underneath it, then releases it slowly upward. A slab sitting on caliche behaves differently from one on sandy loam — it holds more subsurface moisture longer, especially after a rain event or irrigation. That changes both your testing protocol and your mitigation strategy.
Why is my epoxy garage floor peeling in Amarillo?
Epoxy garage floor peeling in Amarillo almost always comes down to one of three causes: moisture vapor pushing up through the slab, inadequate surface preparation, or coating applied before the concrete reached the right moisture level. Of the three, moisture vapor is the most common — and the most misdiagnosed.
Epoxy bonds to concrete through a chemical adhesion process. When moisture vapor rises through the slab after the epoxy cures, it creates hydrostatic pressure at the bond line. That pressure breaks the adhesion from underneath — which is why the coating lifts in sheets or bubbles rather than chipping at the surface. You’ll notice it first near the perimeter, where slabs are thinner and vapor has less distance to travel.
Slab delamination failures also spike in spring and early summer in Amarillo. Soil temperatures rise faster than air temperatures in the Panhandle, and that thermal gradient accelerates vapor drive even through slabs that tested fine in January. If your floor was coated in late fall and started bubbling by May, that seasonal shift is almost certainly what happened.
Poor surface prep — specifically, not grinding or shot-blasting the concrete before coating — is the second most common cause. Paint, oil, efflorescence, or a too-smooth concrete surface all reduce mechanical adhesion. But even a perfectly prepped slab will delaminate if the moisture vapor emission rate is above threshold. Prep and moisture control are both required, and neither substitutes for the other.
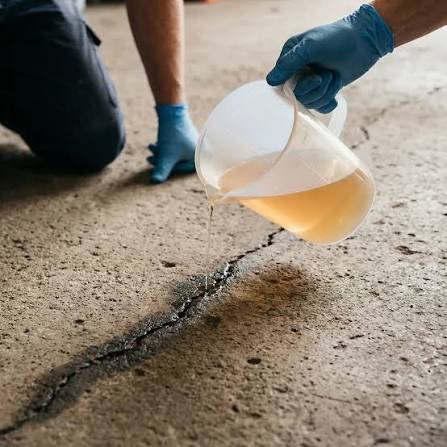
If you’re dealing with epoxy floor over old concrete cracks, note that cracked slabs also allow direct moisture migration — not just vapor — which compounds the problem significantly. Understanding why peeling happens is the first step; the next is knowing how local soil conditions make Amarillo slabs especially vulnerable.

The caliche soil factor most contractors don’t test for
Caliche soil creates a moisture trap that standard epoxy installation guides don’t account for. In Amarillo and across the Texas Panhandle, caliche layers sit anywhere from a few inches to several feet below grade. Because caliche is dense and relatively impermeable, it holds water after rainfall events — sometimes for weeks — before that moisture migrates upward.
When that trapped water eventually moves up through the soil, it hits the bottom of your concrete slab. If the slab was poured without a concrete vapor barrier, or with a barrier that has degraded over time, that moisture moves directly into the slab body. Concrete is porous, so it absorbs moisture and releases it as vapor — right into the bond line of your epoxy coating.
Slabs on caliche-rich soil in the Texas Panhandle commonly show elevated moisture vapor emission for 4–8 weeks after a significant rain event, even when the surface appears visually dry.
This is why calcium chloride test results in Amarillo can vary so much by season. A slab that reads 2.1 lbs in October may read 4.7 lbs in April after spring rains. If you tested in a dry month and coated in a wet one, you’re taking a serious risk. The right protocol is to test twice — once in a dry period and once after a rain event — before committing to a coating system. With that context in mind, here’s how to run those tests correctly.
How do I test my concrete slab for moisture before epoxy?
There are two reliable methods to test concrete slab moisture before applying epoxy: the calcium chloride test (ASTM F1869) and the in-situ relative humidity probe test (ASTM F2170). Both are legitimate and measure different things. For most residential and light commercial applications in Amarillo, the calcium chloride test is the more accessible starting point.
Calcium chloride test (ASTM F1869)
The calcium chloride test measures moisture vapor emission rate (MVER) in pounds of moisture per 1,000 square feet per 24 hours. You tape a sealed dish of calcium chloride crystals to the prepared concrete, leave it for 60–72 hours, then weigh the dish. The weight gain shows how much moisture vapor the slab is releasing.
- Acceptable for standard epoxy: 3 lbs or less per 1,000 sq ft per 24 hrs
- Requires moisture mitigation coating: above 3 lbs
- Most moisture mitigation systems are rated up to 10–15 lbs MVER
- Test kits available from Vaprecision, Wagner Meters, and similar suppliers
- Run at least one test per 1,000 sq ft of floor area; add more in corners and near exterior walls
In-situ RH probe test (ASTM F2170)
The relative humidity probe test drills into the slab and measures RH at 40% depth. It’s considered more accurate because it captures moisture within the slab body, not just at the surface. The acceptable threshold for standard epoxy is generally 75–80% RH. Above 85% RH, most epoxy manufacturers void their warranty without a moisture mitigation layer.
For a quick field check before committing to a formal test, tape an 18-inch square of 6-mil plastic sheeting to the bare concrete with all edges sealed and leave it for 16–24 hours. If condensation forms under the plastic or the concrete darkens, meaningful moisture is present. This isn’t a substitute for a calcium chloride test, but it tells you right away whether moisture is worth investigating further.
Once you know your slab’s moisture level, the next decision is which product layer goes down first — and that’s where many projects go wrong. See our guide on garage floor coating options in Amarillo for a breakdown of how different systems handle varying moisture levels.

Moisture mitigation coating vs. standard epoxy primer: the honest comparison
A moisture mitigation coating wins on slabs with elevated vapor emission — any reading above 3 lbs MVER or 80% RH. Standard epoxy primer is designed for adhesion to dry, prepared concrete and has no meaningful resistance to vapor pressure from below. Using it on a high-moisture slab doesn’t slow the failure — it just delays it by a few weeks.
| Criteria | Standard epoxy primer | Moisture mitigation coating | Winner for high-moisture slabs |
|---|---|---|---|
| Vapor resistance | None meaningful | Rated to 10–15 lbs MVER | Moisture mitigation coating |
| Added cost per sq ft | $0.25–$0.60 | $1.50–$3.00 | Standard primer (dry slabs only) |
| Application window | 4–8 hrs before topcoat | 12–24 hrs cure before topcoat | Tie |
| Compatibility with topcoat epoxy | Universal | Verify by brand — not all topcoats bond well | Standard primer |
| Required on caliche-soil slabs | No (if MVER <3) | Recommended regardless if no vapor barrier under slab | Moisture mitigation coating |
| Addresses long-term vapor drive | No | Yes — creates a blocking layer | Moisture mitigation coating |
| DIY-friendly | Yes | Possible, but mixing ratios are critical | Standard primer |
| Failure consequence if wrong choice | Full delamination within weeks–months | Negligible if used on a dry slab | Mitigation coating (lower downside risk) |
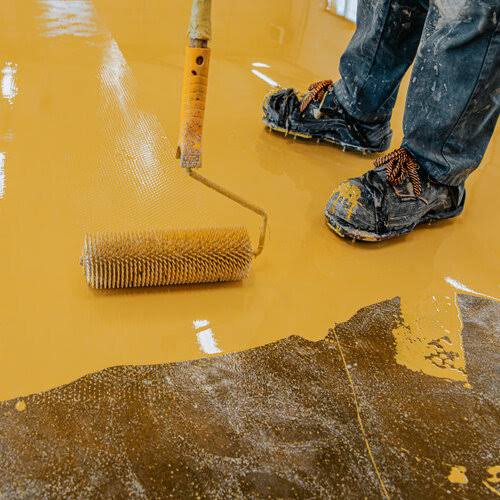
Common moisture mitigation coating products with real-world track records include Mapei’s Planiseal EMB, Ardex MC Rapid, and Laticrete’s Hydro Ban — all two-part epoxy or polyurethane systems engineered to block vapor transmission. These products are formulated specifically to accept a decorative topcoat after they cure, which makes them a direct replacement for standard primer on any slab where vapor is a concern.
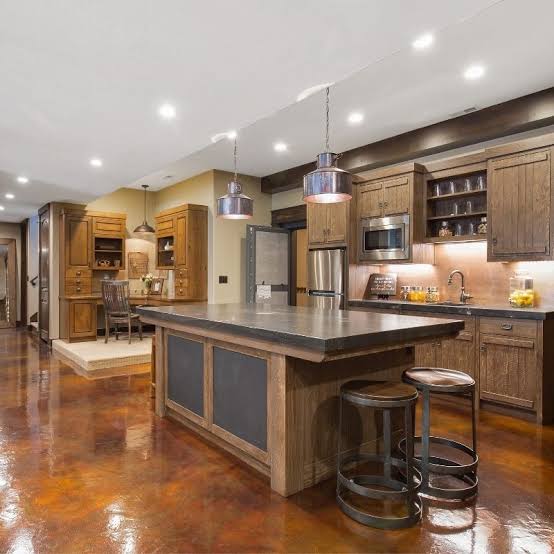
For an epoxy basement floor application specifically, moisture mitigation coating isn’t optional — it should be assumed from the start. Basements in Amarillo sit closer to the caliche layer and have three or more walls of soil contact, so the vapor load is consistently higher than a typical garage slab.
Can epoxy be applied over a slab with high moisture?
Standard epoxy cannot be applied over a high-moisture slab and expected to last — but a two-part moisture mitigation coating can go down first, and quality epoxy can go over that. The distinction matters because “high moisture” doesn’t automatically mean “can’t be coated.” It means the system needs an additional layer between the slab and the decorative epoxy.
Most moisture mitigation coatings are rated for slabs up to 10–15 lbs MVER on the calcium chloride test. If your slab tests above 15 lbs — which is uncommon but possible in severely compromised situations — you need a professional assessment before any coating goes down. At that level, you may be looking at drainage correction, perimeter waterproofing, or slab replacement depending on the moisture source.
The key rule: the moisture mitigation coating must fully cure — typically 12–24 hours at 65°F or above — before any epoxy topcoat is applied. Rushing this step is the most common installation error on high-moisture slab projects.
Temperature matters here too. In Amarillo, spring and fall temperature swings can push garage temperatures below 50°F overnight even when daytime highs are comfortable. Most epoxy systems, including moisture mitigation coatings, need a minimum of 50–55°F surface temperature to cure properly. Coating a slab that dropped to 45°F overnight — even if the air reads 68°F when you start rolling — is a setup for adhesion failure.
Working with experienced epoxy floor installers in Amarillo TX who understand local soil conditions is worth the consultation fee on any slab where moisture is a question. They’ve seen firsthand which neighborhoods have chronic caliche vapor issues and which don’t — and that local knowledge directly affects which system they’ll recommend. Once you know whether a mitigation coating is needed, the next question is whether anything under the slab could have prevented this entirely.
Concrete vapor barrier: what it does, what it can’t undo
A concrete vapor barrier — typically 10-mil polyethylene sheeting installed directly under the slab before the concrete is poured — is the single most effective way to prevent epoxy floor moisture problems on a concrete slab long-term. It physically blocks ground moisture from entering the slab body. The problem: if the barrier wasn’t installed, there is no way to retrofit one under an existing slab.
Older homes in Amarillo — particularly those built before the 1990s — frequently have slabs poured directly on graded soil with no vapor barrier. This was standard practice for decades. If you’re in a pre-1990 home with a ground-level garage or a basement slab, assume no vapor barrier exists unless you have documentation saying otherwise.
For existing slabs without a vapor barrier, a topical moisture mitigation coating is the best available retrofit solution. It doesn’t replicate what a sub-slab vapor barrier does — it can’t stop moisture from entering the concrete body — but it blocks vapor transmission at the surface before it reaches the epoxy bond line. Done correctly, it extends epoxy coating life from the typical 2–5 years on an unmitigated high-moisture slab to 10 years or more.
If you’re planning a new construction pour — even a simple shop or garage addition in Amarillo — spec the vapor barrier in. Ten-mil cross-laminated polyethylene handles punctures during the pour better and lasts longer than thinner alternatives. The cost difference at time of construction is negligible compared to the cost of moisture remediation later. With that foundation in place, here’s how to choose the right approach based on your slab’s actual test numbers.
For more on how coating systems hold up over time in different construction scenarios, see our commercial epoxy flooring Amarillo page, which covers vapor barrier requirements for new pours in detail.
The verdict: which approach to choose based on your slab’s actual numbers
Choose standard epoxy primer and proceed with coating if your calcium chloride test reads 3 lbs or under and your slab has a documented vapor barrier. Choose a moisture mitigation coating first if your calcium chloride test reads above 3 lbs, if your slab has no vapor barrier, or if you’re on a pre-1990 Amarillo slab with caliche-rich soil underneath. Neither option works if the slab hasn’t cured for at least 28 days — allow 60 days for high-clay or caliche soil sites.
Here’s the practical decision tree:
- MVER under 3 lbs + vapor barrier confirmed: Standard epoxy primer, proceed normally
- MVER under 3 lbs + no vapor barrier: Moisture mitigation coating recommended as insurance, especially on caliche soil
- MVER 3–15 lbs: Moisture mitigation coating required before any epoxy topcoat
- MVER above 15 lbs: Stop — consult a professional before any coating decision; possible drainage or structural issue
- New slab under 28 days old: Wait. No coating regardless of moisture reading
The most common mistake is skipping the test entirely and relying on visual inspection. A slab can look completely dry and still fail a calcium chloride test. The test costs $30–$60 for a kit and takes three days. A failed epoxy floor costs $500–$2,000 to strip and recoat. Run the test.
For a broader view of coating systems and what each one is suited for in this region, the epoxy flooring Amarillo TX guide covers system types and local installation considerations in more depth. If you’re comparing residential and commercial floor options side by side, the polyaspartic floor coating Amarillo page also covers how polyaspartic systems handle moisture differently from traditional epoxy.
- The calcium chloride test threshold for standard epoxy is 3 lbs/1,000 sq ft/24 hrs — above that, you need a moisture mitigation coating first, not just a thicker topcoat.
- Amarillo’s caliche soil traps subsurface moisture longer than sandy soils, which means test results vary by season — test twice (dry period and post-rain) before committing to a coating system.
- Slabs without a sub-slab vapor barrier — common in pre-1990 Amarillo homes — will almost
See also: epoxy flooring Amarillo TX
See also: epoxy basement floor Amarillo
See also: epoxy floor installers Amarillo TX
Related: decorative flake blend
Related: oil resistant epoxy